Opponent: Gary
Mission: Seek and Destroy
Level: Alpha
1st turn: Imperial Guard
Points: 2000
Location: Jakarth, Salazar Systems, Skolarii Sector
Background: Commissar Yarrick rushes to Jakarth following the confirmation of Chaos Space Marines on the planet. A further shock is in store though; the forces of Khorne are led by Khârn the Betrayer! This looks like the beginning of another full scale Chaos invasion of the sub-sector. Can Yarrick and Kennell get out alive to warn the Imperium?
Imperial Guard
- Command Platoon 77, Captain Kennell Heroic Senior Officer with carapace armour, refractor field and power weapon, Company Standard, Medic, Master Vox-Caster, Sanctioned Psyker, Commissar with power weapon and bolt pistol, Priest with Shotgun, Rosarius and Holy Relic
- Commissar Yarrick
- Anti tank squad 3, Lascannons
- Sentinel, Autocannon, Extra Armour, Improved Comms
- 8 Stormtroopers, Sergeant with powersword, 1 meltagun, 1 plasma gun, deep strike, infiltrate
- Infantry Platoon 1
- Command Squad 36, Junior Officer with power weapon and plasma pistol, 3 meltaguns, 2 plasma guns, Priest with Rosarius
- Infantry Squad 501, Missile Launcher, Grenade Launcher, Vox
- Infantry Squad 541, Missile Launcher, Grenade Launcher, Vox
- Command Squad, Missile Launcher
- Infantry Squad 609, Missile Launcher, Grenade Launcher, vox
- Infantry Squad 812, Missile Launcher and Plasma gun
- 20 Conscripts
- Armoured Fist Squad 812, Flamer, Chimera with multi-laser, Heavy Bolter, Heavy Stubber
- Sentinel, Multilaser, smoke
- Sentinel, Multilaser, searchlight
- Basilisk, Indirect fire
- Leman Russ, Heavy Bolter
Chaos Space Marines
- Khârn the Betrayer
- 8 Marines with Bolt pistols and Close Combat Weapons, aspiring champion with Daemonic Talons
- 8 Marines with Bolt pistols and Close Combat Weapons, aspiring champion with Daemonic Talons
- Mutated hull predator with hull heavy bolters and twin-linked lascannon
- 7 Marines with 1 lascannon
- 5 Havocs with 4 missile launchers
- Dreadnought with Lascannons
- 8 Bloodletters
- 8 Fleshounds
- 8 Khorne Berzerkers, Aspiring champion with powerfist
- 8 Marines, lascannon and plasma gun
- 4 bikers
Background
We played this game right after our combat patrol mission. Gary was keen to play a full 2000 point game and not mess around with piddly little encounters, and I reluctantly agreed. I was hesitant because I knew we still hadn't got many games under our belt with the new rules, and also because I had to make heavy modifications to my army list to bring it up from 1500 to 2000 points.
Normally I would add Daemonhunters allies but I only had the Imperial Guardsmen in my case, so all I could do was add priests, a psyker, a Commissar and loads of wargear, something I would never normally do. Ho hum.
Terrain and Deployment
While I changed my list Gary put the board together (normally this is my job). This was to have some interesting ramifications later on.
We had the palm trees and Oasis strung across the middle of the board with dunes around and about. We both had a bunker in our deployment zones, on each flank. I set up with my Basilisk behind the bunker with my lascannons in it. The Chimera and Leman Russ covered the Bassie's flank.
This little firebase was opposed by the Predator, the 5 man squad with lascannon and the bikes.
In the centre I had the bulk of my infantry and two Sentinels facing the palm tree 'forest', with the conscripts front and forward. Gary had his two Chaos Marine units hidden behind this wood.
On the left I had an infantry squad on a dune and Captain Kennell's squad behind it, along with Yarrick. They were well placed for a dash to the left or centre for a counter charge, I thought.
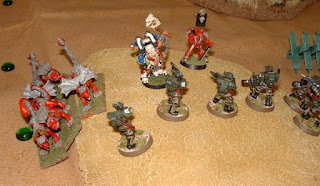
Opposite my Guard, the Chaos army arrayed the Khorne Berzerkers with Khârn, the Havocs in the Bunker and the Defiler behind the bunker.
Turn 1
I won first turn and took it, hoping to cause some damage before the enemy could respond.
I had an absolutely abysmal turn.
My Sentinel autocannon and a missile launcher failed to hurt the Defiler (in fact I missed with all 5 of my missile launcher shots this turn). I fired my multilaser Sentinels at the Havocs but they remained unharmed.
My Russ took out two members of Khârn's Berzerker squad in a spectacular cross-table shot. On the right I killed four models in the Marine squad, leaving the lone lascannon. My Basilisk targeted the Defiler but only scraped its paintwork.
Gary shot the Defiler back at the Basilisk and destroyed it, taking a lascannon out of my anti-tank squad at the same time. He raced his bikes 24" forward and both his Marine units on foot raged a full 6" into the wood, putting them in a good position to assault, and/or summon daemons next turn. His Havocs destroyed the Chimera and reduced the Armoured Fist squad to four models.
Turn 2
I began my second turn in much the same way as I left the first. Four missile launcher shots missed (that's 9 in a row!) and then the fifth was saved by a biker.
My two priority targets this turn were the Berzerkers on my left, with Khârn in tow, and the bikes. Both units had icons in very advanced positions and I needed to take them out. I killed every one of the Berzerkers except the Icon bearer, despite forcing multiple 'torrent of fire' tests. Two bikes remained after massed Imperial Guard fire. Oh dear.
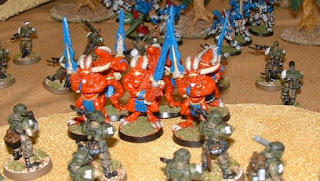
Both Daemon units arrived and for a moment I thought I had some good fortune. They both scattered; the Bloodletters off the bikes into one of my units, and the Fleshounds off the Berzerkers and onto the edge of the board. After some frantic flipping through the new rulebook we decided that the Bloodletters weren't destroyed as their summoning rules don't mention deep strike and part of the template was available to set up six models.
The Fleshounds were even more controversial.
I had strung my Stormtroopers out in a thin picket line in front of the Berzerkers just in case the Daemons arrived here. My reasoning was that the Daemons would have to assault the Stormtroopers as they wouldn't have the movement to run around them towards the middle of the battlefield and hit my units behind. The Stormtroopers left flank was covered by the table edge.
The Fleshounds, though, scattered half off the board edge on the left and Gary wanted to move them in a thin column down the board edge. It turned out that what I thought was the edge of the board was just a ridge caused by the desert mat rutting up where it had been folded, and the actual board edge was a couple of inches beyond that. After some discussion I let Gary go ahead with the move.
I was doomed.
His Defiler hit my Command squad behind the dune and despite having 10 leadership I failed my pinning check. That meant I had no counter attack to throw at the Flesh hounds as they hit an infantry squad on my left.
Khârn finished off the Stormtroopers, while in the centre both of Gary's Marine squads raged again and assaulted the conscripts, wiping them out and running them down. The Bloodletters also charged an Infantry squad, right in the heart of my lines, killing them all and then consolidating into another squad.
The rest of the game consisted of me trying ever more risky moves to try and stay in the game only to fail miserably. The Daemons pretty much did for all of the infantry squads over the course of the game then they in turn were killed by the dregs of Kennell's command section. They were subject to several more bombardments during the game (both indirect and direct) and they were eventually killed.
Only two more things stood out for me in the game. Yarrick took on a full Marine squad and destroyed it single handedly, and I threw a Sentinel into combat with Khârn and it held him up for the rest of the game.
It was far too little, far too late, though. Gary ran out a very comfortable winner.
Kennell's Commendation: The Sentinel driver who 'danced' with Khârn for several turns and kept him away from the rest of my army.
Learning points
- My defeat here had nothing to do with my army list really, it was due to having two extremely poor turns at the start of the game. Because we play such polarised armies the early part of our games are crucial to each army. If I roll well or Gary rolls poorly then he doesn't make it into combat and goes down to my superior firepower. Conversely, if the roles are reversed then his army makes it into combat relatively unscathed and chops my Guardsmen into tiny little pieces. This time the dice fell heavily in Gary's favour and he took full advantage of it.
- I must try and keep my Guardsmen over 6" apart to stop consolidation by close combat opponents. This means I'll need to bunch my models together, which is dangerous against template weapons, but the trade off will probably be worth it. I'll try it out in future games.
- That table edge dispute was a real killer for me, making a mockery of my battle plan. Oh well, at least it is extremely unlikely to happen again.


No comments:
Post a Comment