Sunday, November 23, 2008

WARRIORS OF CHAOS versus Dark Elves

Game: Warhammer Fantasy Battle 7th edition
Opponent: Gary
Scenario: Pitched Battle
1st turn: Warriors of Chaos
Points: 2000
Background: This was only my second game using the new Warriors of Chaos army book. I hadn't had time to read through all the new magic weapons, armour and the rest of the paraphernalia to arm my characters and then I thumbed past Archaon. I use his model as my own Lord and I'm light on rank and file models so why not just bang him in for a game?

Warriors of Chaos
  • Archaon (Flickering Fire and Pandemonium spells)
  • Thaer, Exalted with additional hand weapon, Shield
  • Angur, Lvl 2 Tzeentch Sorcerer (Flickering Fire and Pandemonium spells)
  • 12 Warriors, standard, musician
  • 10 Warriors, standard, musician, Banner of Wrath
  • 16 Marauders, standard, musician, shield and light armour
  • 5 Knights, standard, musician, Warbanner
  • 5 Marauder Horse, musician, flails
  • 5 War hounds
  • 5 War hounds
  • Chariot

Dark Elves

  • Level 4 sorceress with sacrificial dagger
  • Lvl 2 Sorceress
  • Lvl 2 Sorceress
  • Assassin
  • 2 Repeater Bolt Throwers
  • 10 Repeater Crossbows
  • 16 Spearelves full command
  • 5 Dark Riders
  • 5 Dark Riders
  • 19 Executioners full command Banner of Murder
  • Hydra
  • Chariot
  • Chariot

Terrain and Deployment
Gary had set up the table for my arrival. The main terrain feature was a shallow stream running up to a stony lake in the centre of the table. Ruined buildings and a wood made up the rest of the terrain. I immediately knew I'd be in for a tough game as my movement would be restricted, allowing the Dark Elf shooting and magic to increase their effectiveness. I'd have to be very careful with my deployment.

Fortunately I won the choice of table edge. This meant I could attack from the side nearest the lake; once I got past that pinch point in turn two or three I'd have a free run to the Dark Elf units. My main attack would be in the centre and I had my large Warrior unit, Chariot, Marauders and a Warhound unit here. My right flank would be contested by the Marauder Horse, Warriors with the Banner of Wrath and more dogs. The Knights deployed on my extreme left flank. I deliberated over placing the characters for some time. Archaon could move through the woods and stream without penalty so I knew I'd place him on a flank; eventually I put him with the Knights (representing the Swords of Chaos). My Exalted went into the Marauders and the Sorcerer joined the central Warriors.

My plan was essentially a double envelopment. On the left my Knights would march around the woods to be in the Dark Elf deployment zone and threatening flank and rear charges from turn 4 onwards. I planned to split off Archaon and put him in the woods to get those flank charges a turn earlier.

On the right I hoped the Warriors would dominate and allow the Marauders to cross the bridge and attack the Dark Elf flank.

My middle would have to hold position for three turns at least. My worry was that the Dark Elves would spot my flanking forces and simply push forward, killing my central units and ending up far away from my flankers.


The Dark Elves faced down the Knights with a unit of Dark Riders. The other Dark Riders deployed on my right along with 10 Repeater crossbows and a Sorceress. The rest of the Dark Elves set up in the pocket in the centre.

The game
I won the turn to go first and everything marched forward. My Knights moved slowly out of the ruined building. My magic was spectacular with a single flickering fire spell destroying a chariot!

The Dark Elf magic phase was no less devastating with my own chariot being destroyed in turn!

The game quickly broke up into three main battle zones; the extreme left, centre and far right.

The Dark Riders on my left parked themselves awkwardly in front of my Knights. I charged Archaon out and they fled back into the woods. This allowed my Knights their full march move up the flank. The Dark Riders rallied and moved back toward the Swords of Chaos. Again I charged them with Archaon and again they fled. My Knights continued their march up the left. I think Gary was wrong footed by this as he thought I would swing them right into the centre. I don't think he could believe I had planned to run them right around the woods, effectively taking them out of the game for four turns. Gary is a much more direct player than me and in a similar situation he would have put Archaon in the Knight unit and simply rammed them up the centre. Which approach would turn out to be best?
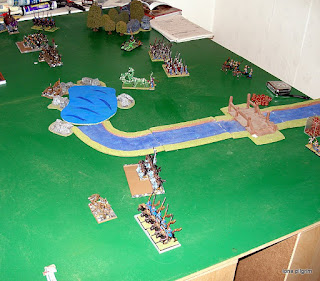

On my right the other Dark Riders charged my Marauders and slaughtered them. In a worrying turn of events their pursue move took them past the Warriors. My Warhounds eventually failed a panic test and ran away.

Over the next few turns Gary shot at my Warriors with the Banner of Wrath with everything he had, including the Bolt Throwers, and decimated the unit. In return I whittled away at the Repeater Crossbows with my magic missiles.

Eventually only my Warrior with the Standard remained and the Dark Riders charged him. He ran 9" straight through the Crossbows (who were now below unit strength 5) and out the other side. The Dark Riders pulled up short, not wanting to run down the Crossbows and thus my plucky little Warrior survived a bit longer.

The battle was always going to be won and lost in the centre.

Magic played a massive part in the action. Over three turns the Dark Elves miscast four times; once due to Pandemonium and once due to the sacrificial dagger. Spells were forgotten, wounds were lost and the magic phase ended but the Sorceresses endured. I wished I had picked the Infernal Puppet for this game. Still, the Dark Elves caused casualties to my Warriors and Marauders. My own Sorcerer chipped away with flickering fire and tried to get Pandemonium off.

My Warhounds had fled but eventually rallied on the board edge. They moved back up to support my units but played no further part in the game.

The loss of my Chariot was a blow as it meant the Hydra could move up on the flank of my Warriors. It flamed them, killing a couple. I shuffled the unit back to face the front of the monster and the Sorcerer left the unit. Gary was surprised I had blocked his line of sight for flickering fire but I explained that he had cast Pandemonium so he couldn't cast another spell. Gary insisted that Pandemonium had come from Archaon. In the end I accepted his view to keep the game moving.

The Hydra charged into the Warriors but rolled poorly. The Warriors caused a wound or two and their standard and outnumbering helped to win them the fight. The Hydra stayed. It was crucial to my plan that the Warriors would hold my flank.
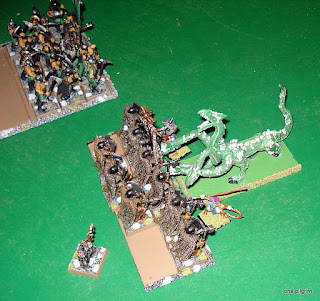
The Dark Riders exited the table stage left pursued by Archaon. My Exalted charged out of the Marauders to hold up the chariot. To my surprise Gary chose to flee. Although it rallied, this meant that it was now a sitting target in front of my Knights which had finally rounded the woods. Archaon positioned himself to charge out of the woods.

In a crucial round of combats my Warriors excelled themselves and took the Hydra down to a single wound. The beast broke. The Executioners turned to face Archaon and the Assassin revealed himself in the unit.


Bolt thrower shooting took out two of my Knights but the survivors crashed into the chariot and destroyed it. Flickering fire from my Sorcerer took the last wound from the Hydra. Archaon charged out of the woods and took on the Assassin in the Executioners. The Everchosen survived the Assassin's attempted killing blows and unleashed the daemon from the Slayer of Kings. He annihilated the Assassin and the whole unit broke and were run down. Archaon overran into the Spearelves.

Archaon steamed straight on through the Spearelves and they broke and were run down too. The Sorceress was trampled into the dirt. One of the bolt Thrower teams ran off the table in terror. Archaon marched on over the bridge toward the Dark Elf survivors. He was just in time to see the Warrior with the Banner of Wrath get shot to pieces.

In the very last action of the game the Sorceress, Repeater Crossbow unit and the Dark Riders all ran off the table due to terror.

Result: Win

Learning points
  • My plan worked perfectly. The game worked out (except on my right) exactly as I envisaged, which is the first time this has ever happened to me in a Warhammer game. I think I'm getting the hang of it a bit more. It was a gamble having almost half of my army (in points values) out on my left flank but I knew I would be in a strong position in the second half of the game. The question was would Gary realise my plan and be able to counter it? In the crucial centre he made a half-hearted attempt to attack with the Hydra with the Executioners, chariot and Spearelves jockeying for position. That meant I could shuffle around myself until, literally, the cavalry could arrive.
  • I still need to work out how to use my Marauder horse and Warhounds more effectively. I lost them very cheaply in this game.
  • Tzeentch Sorcerers and magic are very effective and their spells are great against the Dark Elves. I'll definitely return to this lore in the future.
  • Using Archaon was fun but I'm not a massive fan of special characters - I much prefer to create my own personalities and develop them over the course of my games. I'll keep experimenting in the future so I don't think I'll be using him for a while.

Sunday, November 16, 2008

WARRIORS OF CHAOS versus Dark Elves

Game: Warhammer Fantasy Battle 7th edition
Opponent: Gary
Scenario: Pitched Battle
1st turn: Dark Elves
Points: 2000
Background: I bought the new Warriors of Chaos book earlier the same day that we played this game. To keep things simple for me I chose the same list as I played in my last game using the Hordes of Chaos book. I figured that it was the best way to find out how much my force had changed, as well as that of the emo elves with their new army book.

The photos aren't great in this report because I forgot my camera and had to use my mobile phone.

Warriors of Chaos
  • Sigurt Volsung, Lord on Daemonic Mount, Armour of Damnation, Golden Eye of Tzeentch, shield
  • Thaer, Exalted with Book of Secrets, Sword of Battle, Shield (Steed of Shadows spell)
  • Angur, Lvl 2 Sorcerer with Black Tongue (Dark Hand of Death and Doom and Darkness spells)
  • Boda, Lvl 2 Sorcerer with Infernal Puppet and Talisman of Protection (Fireball and Burning Head spells)
  • 12 Warriors full command, Blasted Standard
  • 10 Warriors full command Banner of Wrath
  • 16 Marauders, full command, shield and light armour
  • 5 Knights full command, Warbanner
  • 5 Marauder Horse, musician, flails
  • 5 War hounds
  • 5 War hounds
  • Chariot

Dark Elves

  • Level 4 sorceress with sacrificial dagger
  • Lvl 2 Sorceress
  • Lvl 2 Sorceress
  • Assassin
  • 2 Repeater Bolt Throwers
  • 10 Repeater Crossbows
  • 16 Spearelves full command
  • 5 Dark Riders
  • 5 Dark Riders
  • 19 Executioners full command Banner of Murder
  • Hydra
  • Chariot
  • Chariot
Terrain and Deployment
Gary had already set the table up before my arrival. He asked if I wanted to change things up but I was happy enough with the table. I determined to choose the side with the single hill if I won the roll off which I duly did. I then knew Gary would bunker around the hill and therefore I could array my full force against it.


From left to right I had the Knights, 10 Warriors with Banner of Wrath, Exalted and Sorcerer Boda, Marauder Horse, 12 Warriors with Blasted Standard including Lord, Chariot, 5 Warhounds, 5 Warhounds and finally the Marauders with Sorcerer Angur.

The Dark Elves (from my left to right) were Dark Riders, Executioners with Sorceress, Chariot, Bolt Thrower, Crossbows with Sorceress, Bolt Thrower, Spearelves with High Sorceress, Hydra, Chariot and Dark Elves.

The game
Despite my +1 for completing my deployment first the Dark Elves kicked off the game.

The two Dark Rider units pushed forward on either flank, the nearest to my Knights dangerously so, I thought. The Executioners followed up behind. In the middle of the battlefield the Hydra and Spearelves moved up. The Chariot went stupid and stumbled forward. His magic took out four or so Warriors from the Lord's unit.

My Knights charged the Dark Riders near the rocky column. Gary was convinced they were out of range so held but the Knights were a good inch close enough. The light cavalry were slaughtered in short order so the Knights overran into the Executioners.

I marched the Warhound units into the centre of the board trying to tempt a charge from the Chariot and Hydra. The Marauder Horse angled off against the chariot under the hill. My Marauders on foot faced off against the Dark Riders to their right. Thaer, my Exalted, used his steed of shadows spell to land behind the chariot under the hill, threatening the Bolt Thrower.


The Assassin revealed himself in the Executioner unit but all his attacks only killed my champion. In return the rest of the Dark Elf front rank died. The Elves held on with a five on their break test.

The chariot on my left charged my Marauder Horse who fled right through my Lord's unit and out the other side. The nearest Bolt Thrower on the hill turned and skewered my Exalted with a single shot. The Hydra's breath weapon killed three Warhounds from one unit while other shooting killed two from the other unit. Magic whittled down more of the Lord's Warriors but then a Sorceress failed to cast a spell. My Black Tongue turned this into a miscast but the Elves rolled a seven so the best I could do was change it to an eight and end the magic phase.

The chariot on the right moved toward my Marauders on foot and the Dark Riders set up a side charge.

My Marauder Horse rallied and angled themselves in front of the Chariot. The Marauder foot turned to face the Dark Riders. The Sorcerer moved out of the unit and tried to cast Doom and Darkness on the Chariot. I got the spell off but Gary dispelled it.

My Knights butchered more of the Executioners and this time their morale failed and they were run down, Assassin, Sorceress and all. The Knights ended up alongside the hill, flank on to the Bolt Throwers. Gulp!

My Lord charged out of the 12 Warriors at the Chariot along with my 10 Warriors. The Chariot fled behind the Spearelves, leaving the Lord in a vulnerable position.

The Dark Elves won the game in this turn. One Bolt Thrower shot killed three of my Knights with a single shot. The other killed my Lord in a single shot. Spectacular magic and crossbow shooting decimated my Warrior and Warhound units. My Warriors with the Banner of Wrath and containing Sorcerer Boda failed their panic test and ran. Even my Chariot took a flukey wound.

On the right the Chariot charged my Marauder Horse which fled. The Chariot carried on into my Marauders who were also front charged by the Dark Riders. The shattered unit outran their pursuers. Sorcerer Angur was understandably unsettled and panicked toward the table edge.

The game was all but over but I soldiered on until turn six. I lost the last Knight because I forgot to move him (he was in amongst Gary's deadpile - I have forgotten to move so many units and missed so many enemy units that I call this deadpile camouflage). I got a charge off against the Spearelves with my depleted Warrior unit but the craven Dark Elves fled. Unfortunately for me they rallied before they hit the table edge. They eventually ended up fighting the rallied chariot instead. No-one got anywhere near the hill. The repeater crossbows were reduced to just three models but they never failed a panic test in the whole game.


I lost my Chariot to another single Bolt Thrower shot. My Marauders did not rally and ran off the table. The Sorcerer was mashed by the Chariot.

Result: Loss

Learning points
  • The Dark Elf army book is stronger while the Warriors of Chaos are weaker. I just never put any pressure on the Elf sorceress who ran amok for the whole game. The Sorceress never came close to failing to cast a spell, never mind miscasting. The DE chariots are better and I missed my Furies.
  • We got lots of rules wrong in this game. Gary was holding his units back which I later discovered he can't do but he was also forgetting to re-roll his missed hits. I forgot most of the extras I had added to the list like the Blasted Standard and the Talisman of Protection. Additionally we are both shaky on the basic game rules and we had a stop start game while we scoured the rulebook. Practice makes perfect I guess.
  • I now have a week or so to read the book before our next game so my list and tactics should be better. The only thing I can't do is change the models for the time being.

Saturday, November 15, 2008

Gauntlet 2008 Aftermath

To be perfectly honest, there were a lot of things about this tournament that I didn't enjoy.

Having said that, because I'm a fairly polite chap, and I was taught to accentuate the positive rather than dwelling on the negative, I'll explain the things I did enjoy first.

I missed out on the 40k Grand Tournament heats due to work commitments, football and Liz and Simon's wedding (I hope you're enjoying Cuba!). So I was overjoyed when I heard about The Gauntlet Tournament. It was an event I'd enjoyed and done well in over the years. I'd been three times previously and won best painted army twice and overall once. The tournament was held on an unusual Thursday rather than a weekend (due to the fact the Warhammer World was booked solid on weekends right through to February) so many people couldn't attend, but this was perfect for me because I have the hardest time getting weekends off. Booking a single weekday off was relatively straightforward.

Another upside to The Gauntlet is that it is a one day competition meaning that it is cheap because no overnight accommodation is required. Games Workshop also organise coach travel to and from the venue, reducing costs further, and they even throw in a meal at the venue. The total cost for me on the day was a bargain £25.

Warhammer World is a great setting in which to play games and the ready access to Specialist Games products and Forge World models is a real bonus. I didn't go mad this year as I was purposely reigning in my model purchases, but I did pick up the Imperial Armour Modelling Masterclass book to read on the coach ride back.

Then of course there are the other benefits to playing in any tournament; playing against a range of different players with unique tactics and armies that you've never encountered before, seeing imaginative conversions and well executed paint schemes. The whole social side of tournaments is great as you check up on how your regular gaming buddies are getting on, how your opponents have fared and chew the fat on the hardest armies, the cheesy lists and the unlucky dice rolls.

But there were problems.

The first was of my own making. I had just committed to painting up my Blood Angels a couple of months before I found out about the tournament and stupidly I decided to take them instead of one of my already fully painted armies. I could have taken my Chaos Space Marines, Imperial Guard or even Daemon Hunters, but no, I stuck with the Blood Angels.

So I ended up playing an army which was severely restricted in the models I could choose from, with a new codex I hadn't used before and with a set of main rules I hadn't really read. I tried to get in as many practice games as I could but they were always at the expense of painting time. In the end I think I played five or six games at most before the tournament. Not good preparation.

Painting was it's own problem. I had a very hectic schedule with work and other social engagements and I was already committed to the Warseer Tale of 40k Painters (TO40kP) painting pledge. If I had relaxed my painting standards I might have been able to add more models, particularly the Troops choices I was severely lacking, but I was already set on painting to my highest quality. I was also wary of painting too much and skewing my schedule for the TO40kP. In the end I had to settle for finishing five Tactical marines, five Death Company and a Chaplain. Although this kept my painting on track it did hamper my army list.

The Chaplain was a bone of contention too. A week and a half before the tournament I had decided that the above would be all I would be able to paint so I wanted to have Lemartes as my Chaplain model. The one I already had was armed with a plasma pistol and cost 10 points more than the special character despite having one less wound and fewer abilities. I went into my local Games Workshop to discover there was no Lemartes on the shelf. No problem the staff said, just order it online and it will be delivered to the store in the next few days. I used the in-store computer but my registration details kept crashing on the brand new UK website and I eventually had to phone the order in (it later turned out that the GW web staff were tweaking the web store while I was trying to access it). In the event Lemartes didn't arrive in the store until two weeks after the tournament was over! I had to go with my overcosted stand in.

I've mentioned this before in my main lone pilgrim blog, but I'll briefly mention it here too. I varnished my models to protect them for the tournament and they got all frosted. I managed to salvage the models to a certain degree but it is still evident on many of them. Aaaaaaarrrrggghhh!

Games Workshop broke one of the golden rules of tournament organisation with the Gauntlet; they didn't produce a rules pack in advance. In fact, having participated in the tournament, I'm still not sure what the tournament rules were, what armies were permitted, if there were any house rules and if there were any 'soft' scores like painting, sportsmanship or army background.

Things came to a head when registration started. Players were handed a sheet which stated which missions would be played - a mix of all mission types and deployment. However, the attached scoring sheet only had space to mark down kill points, not the objectives captured. When we asked what to do we were told that kill points would be used in all missions and to ignore objectives!

Obviously this made no sense whatsoever, and the Imperial Guard player I was standing next to at the time was ready to punch someone. We resolved to just play the missions as they were in the book and write down the objectives we controlled at the end of the game, rather than kill points. It later turned out that other people had been told to record kill points as well as objectives controlled to help with separating drawn players. This made much more sense but I didn't find it out until the end of my second game. I subsequently ended up a few places lower in the rankings than I should have done as I I hadn't recorded my kill points in the first game.

Another rumour that went around the hall was that bonus points were at stake for handing in a page of army background. This absolutely incensed me as I take great pride in writing up battle reports, coming up with character and army backgrounds - for the Emperor's sake I've even created an entire Sector in which my armies fight! If I'd known in advance I could have brought any amount of army background to the tournament. To this day I still don't know whether army background was actually taken into account or not.

Bad feeling continued into the games across the whole day. One guy I was playing next to complained bitterly about his opponent using Mephiston as he thought special characters weren't allowed. Other players complained that many players were using the Space Marine codex as it had only just been released a couple of weeks before. The players themselves didn't know how to play their own armies so their opponents didn't have a chance. I found out after the tournament that my first opponent got two rules for Vulkan, the Salamanders Chapter Master, wrong - in his favour of course.

All this confusion really upset a lot of the players and started everything off on a bad footing. The most frustrating thing was that it was so preventable. A nice early rules pack distributed to all of the participating stores would have solved most of the problems in advance.

All in all then, I'd give the event a disappointing 6 out of 10.

Sunday, November 2, 2008

SPACE MARINES - BLOOD ANGELS versus Space Marines

Game: Warhammer 40,000 5th edition, Gauntlet Tournament game 3
Opponent: James Brown
Mission: Annihilation
Deployment: Pitched Battle
1st turn: Space Marines
Points: 1000
Location: 671.M38, Insolitus, Halasus Marches, Skolarii sector
Background: The Blood Angels track down the renegade Exigators Space Marines on Insolitus and bring them to battle.

Blood Angels
  • Chaplain, plasma pistol, jump pack
  • 5 Death Company Marines with jump packs
  • 10 Tactical Marines, flamer, Vet sergeant with Powerfist, missile launcher, Rhino
  • 5 Tactical Marines, melta gun, Vet sergeant with Powerfist, Razorback with las cannon
  • Furioso Dreadnought, Venerable, Death Company
  • Predator Destructor with autocannon and heavy bolter sponsons

Space Marines
  • Captain
  • Dreadnought
  • 10 Tactical marines
  • Rhino
  • 5 Tactical marines
  • 5 Tactical marines
  • 8 Sternguard
  • Drop Pod
Terrain and deployment
I won the choice of first turn and gave it to James to negate his drop podding Sternguard. He spread his army out across his entire deployment zone. I began with everything off the board. My plan at this stage was to bring everything on on one flank and fight half of his army will all of mine, then roll up the rest.

The game
The enemy marines advanced cautiously forward across the whole front.

I got the Dreadnought, Death Company and Razorback from reserve. I brought them on to the left flank so I could us the central hill to block line of sight.

At this point we remembered the Drop Pod James had forgotten to deploy in his turn one. He brought it down in his third turn, hoping to hit the Death Company. Fortunately for me they scattered away out of rapid fire range.

The Predator came on from reserve and parked on the hill on my left to give covering fire in later turns. My Death Company pounced on his combat squad in the ruins on the left and slaughtered them for no losses. The Razorback and Dreadnought followed up behind.

The Blood Angels attack hard up the left flank

The Tactical squad in the Rhino dismounted to rapid fire my Death Company. Only one Blood Angel died. The Rhino itself zoomed off down my left flank going God knows where. The Captain and Dreadnought tag team made for the Sternguard in the middle of the board. The Sternguard moved up behind the central hill.

My own Rhino exploded onto the board and spilled out it's Tactical squad to rapid fire the Sternguard. The Dreadnought stomped over and contributed some firing too. More firepower rained in from the Predator. The Sternguard unit was gutted.

The Sternguard and Tactical squad are about to disappear

The Death Company tore into the ten Tactical Marines before them and killed them to a man for no losses. Ouch.

The Razorback and Tactical squad immobilised the Rhino.

Now the Captain and Dreadnought turned back to take on the Death Company. The remaining Sternguard failed to take out my Furioso. Long range Tactical squad fire dropped another Death Company marine.

My Dreadnought charged into the last Sternguard and wiped them out. My Tactical squad remounted their Rhino but it's over-charged engines stalled. The Tactical squad in the Razorback destroyed the Rhino.

I charged the Death Company into the Captain and reduced them to one wound, taking one casualty in the process.

The game promptly ended in turn five.

Result: Win (4 kill points to 0 kill points)

Learning points
  • James didn't support his own units so I was able to take him on piecemeal and control the game.
  • The Death Company were simply awesome in this game, living up to their fearsome reputation.
  • A shame the game didn't go on for another turn or two to see how our two HQ's and two Dreadnoughts would have fared against each other.

Saturday, November 1, 2008

SPACE MARINES - BLOOD ANGELS versus Chaos Daemons

Game: Warhammer 40,000 5th edition, Gauntlet Tournament game 2
Opponent: Gary
Mission: Capture and Control
Deployment: Dawn of War
1st turn: Chaos Daemons
Points: 1000
Location: 278.M41, Mandag, Hexen Sub, Skolarii sector
Background: The Blood Angels discover that the insidious Tau have corrupted the local population and have begun to colonise Mandag. Do they have anything to do with the Chaos Daemon incursion? Amidst the deserted ruins of their settlement the Blood Angels take on the Daemons once again.

Blood Angels
  • Chaplain, plasma pistol, jump pack
  • 5 Death Company Marines with jump packs
  • 10 Tactical Marines, flamer, Vet sergeant with Powerfist, missile launcher, Rhino
  • 5 Tactical Marines, melta gun, Vet sergeant with Powerfist, Razorback with las cannon
  • Furioso Dreadnought, Venerable, Death Company
  • Predator Destructor with autocannon and heavy bolter sponsons

Chaos Daemons

  • Bloodthirster
  • 10 Bloodletters, Icon, Instrument of Chaos
  • 10 Bloodletters
  • 5 Bloodletters
  • 8 Daemonettes, Icon, Instrument of Chaos
  • 8 Flesh Hounds
  • Daemon Prince with Iron Hide
Background
We get up at 4:00am and travel for 4 hours to get to Warhammer World only to have to play each other in a game we could otherwise play at any time at home. And we aren't allowed to swap opponents. Great.

Terrain and deployment
I set up my combat squad with the missile launcher near my objective. I had placed the objective there so that it was in relatively good line of sight from a variety of directions, and also near the impassable buildings which would make it risky for the daemons to deep strike close to. I kept the rest of my army off the table to see where the daemons would land before my army arrived.

The game
Gary got his preferred units of the Bloodthirster, one large Bloodletter unit, the Flesh hounds and the Daemonettes. They all landed centrally, supporting each other. In previous games against me Gary had learned not to leave his units isolated and to wait for reinforcements before launching a co-ordinated assault. The Daemonettes scattered onto one of the Bloodletter units which meant I got to place them. Much to Gary's surprise I put them behind my Tactical marines and in my deployment zone.


Daemons, fahsends of 'em

In my turn I moved the marines back toward the Daemonettes, away from the other daemons and the objective. I surprised Gary again by not rapid firing at the Daemonettes but by shooting them with bolt pistols and then charging in. Two marines died but they killed four Daemonettes. The combat continued.

I had put Gary in a tough spot. He could lunge forward and save the Daemonettes but that would leave him vulnerable to my units arriving from reserve or he could hang back and wait for his next wave but lose the Daemonettes and have to weather more shooting. In the end he chose the latter.

The second large Bloodletter squad dropped into the centre and the smaller squad warped in on the Daemon objective. The Bloodthirster was hiding behind a comically small building, as you can see in the photo above.

Another two Daemonettes fell but dragged down another marine.

I got the Predator, Razorback, Dreadnought and Death Company from reserve. Both tanks entered on my left and opened fire on the cowering Bloodthirster but did nothing. The Death Company charged in to butcher the Daemonettes and save the last two marines, including the missile launcher. Both units consolidated backwards. The Dreadnought anchored the right flank of my army.

I now had a thin red line hugging my own board edge.

The Daemon Prince arrived in the wood on my left and ran to the far side of it, threatening the Razorback. The Bloodthirster slid left too. All the Daemons in the middle moved forward toward my objective. Crucially, the Flesh Hounds only got a one on their run roll so they were short of assaulting the Death Company (it was actually so tight that we rolled a d6 and Gary lost).

Both armies dance around each other

I got the Rhino and combat squad from reserve and had my own tough decision to make. I could use them to reinforce the fight around my own objective, virtually guaranteeing a draw or I could make for the enemy objective and risk a win or a loss.

Eventually I deployed them on the far right to try and get the win. They would have to roll lots of difficult terrain tests to get to the enemy objective but I hoped they would give Gary something to worry about.

My Dreadnought charged into the Hounds. He rampaged through them and they were unable to hurt the behemoth. Their fearlessness counted against them as they lost models each turn to the no retreat rule.

Meanwhile the rest of my army shot the snot out of the Bloodthirster. When the smoke cleared from the autocannon, krak missile, heavy bolters, las cannon and bolter shots the Greater Daemon had lost two wounds.

I had slid the Razorback six inches toward the Predator to get away from the Daemon Prince. The Death Company braced for a counter assault into the Bloodthirster.

The Bloodthirster swooped in and crushed the Predator.

The Bloodthirster mangles the Predator

The Daemon Prince got tangled up in the woods and failed to contact the Razorback. The Bloodletters were in a real quandary in the centre as they were scared to push forward past the Dreadnought and were wary of the Rhino squad homing in on their objective.

My Death Company bravely jumped in to take on the Bloodthirster. Four marines lost their lives but the beast was banished back to the warp.

I drove the Razorback twelve inches up to get it away from the Daemon Prince and closer to the objective.


The game hangs in the balance

The Rhino threw a track in the forest on the right. That left the marines stranded miles away from the objective and the action, and effectively out of the game. My daring flank attack had failed.

Gary and I were playing the game very quickly now as the time limit was looming.

The Daemon Prince assaulted the Razorback and destroyed it.

A Bloodletter squad assaulted the Dreadnought. I couldn't understand why Gary would do that and asked him about it. He said he had a decent chance to penetrate the rear armour. I reminded him that because the Dreadnought was a walker with a WS he had to hit the front (just like the combat with the Flesh Hounds). Gary was mortified so I let him move the models differently. It didn't matter much; all they could do was move close to my objective.

I charged the Furioso in and started hacking the Daemons apart. Again their fearlessness meant they kept taking lots of casualties.

My number one priority was now to drop the Daemon Prince. The remnants of my original combat squad, the Razorback squad and the Death Company all opened fire, intending to soften it up before the Death Company charge. When the smoke cleared the monster was dead from shooting alone!

In the next turn my Furioso finished off the Bloodletters and my Razorback combat squad got to within 3" of my objective. The remaining Daemons hung back protecting their own objective.

'If you want the objective then you'll have to come through me'

Result: Draw

Learning points
  • This was a much better showing for my Blood Angels against the Daemons. Keeping my units in reserve allowed me to negate the Daemons deep striking and also scared them away from my deployment zone. Winning the choice of second turn for a change helped immensely.
  • I also protected my Troops better. In 4th edition I would have left the combat squad on the objective and shot at the Bloodletters, maybe killing a few for the loss of my unit. Instead I pulled them back, sacrificing early kills to keep them alive. In the end this was vital.
  • This time against the Daemons I chose the fights and it showed; if the game had gone on beyond turn 5 I might have threatened the enemy objective.
  • Will I ever roll better than a one on a difficult terrain roll?
Posted by Picasa