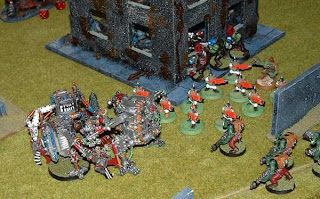
Sunday, November 15, 2009

AI: Imperial Navy versus Ork Air Waaagh

Game: Aeronautica Imperialis
Opponent: Solo
Mission: None
Points: 42
Background: Ork activity has increased right across the Skolarii sector at the end of the 41st millennium. Part of the Imperial response is to allow the Imperial Navy to form an Afriel Strain wing of pilots, the 332nd Fighter Group. Their first engagement is on the Hiveworld of Finschan in the Kandaeon Worlds. Orks have entrenched themselves in the rolling dunes outsides Finschan's hive cities for centuries and have been largely contained, but recently the frequency of their attacks has increased and they have even managed to construct a few squadrons of aircraft. Kolath's Ironkarts are foremost amongst them.

Imperial Navy - 332nd Fighter Group
  • Thunderbolt C 'Overkill' pilot Vladimir Tancred
  • Thunderbolt 1 'Noble Victory' pilot Zaltys Davren

Ork Air Waaagh - Kolath's Ironkarts

  • Fighta 'Jawz of Doom' pilot Skargrod Nobskab
  • Fighta 'Da Ridgeback' pilot Shakskab Naffrunt
  • Fighta 'Flaming Deff' pilot Wazgul Ugrot

Background
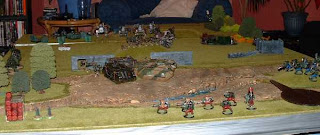
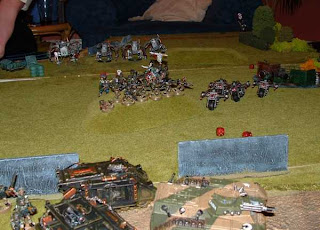
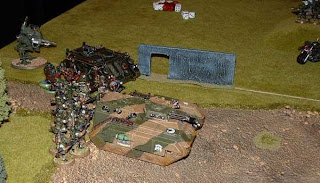
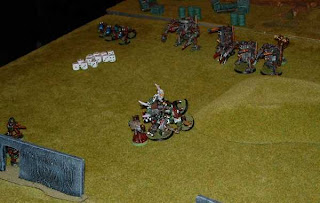
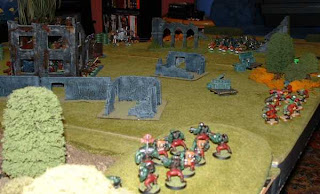
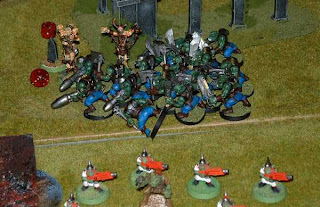
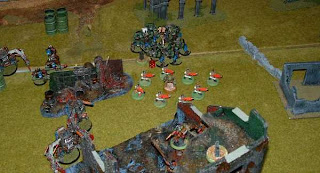
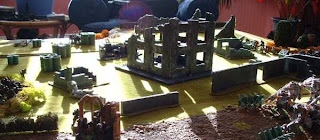
Having painted around 80 points of Imperial Navy and Ork Air Waaagh AI planes I decided to put some fighters on the table for a run through of the rules. Rather than just a dryly move the models about I came up with a simple solo rule so I could play through a game.

Instead of choosing which manoeuvre each plane would perform I would instead roll an eight sided die. I would chose the direction and thrust based upon the tactical situation and what I thought the 'real' pilot would do (ie the Orks would get stuck in whenever possible!). I allowed myself a re-roll of the D8 if the first manoeuvre meant the plane would crash into the ground, stall or fly off the battlefield. I would abide by the second roll whatever the result.

Terrain and deployment
There was no terrain and no scenario - I just lined the planes up on each of the short table edges and went at it!


The game

Turn 1
The Imperials won initiative and stayed close together, Overkill making a high-g turn with Noble Victory side slipping.

Flaming Deff turned into the path of the Thunderbolts, while Da Ridgeback flew straight on. Jawz of Doom was further out on the right and made a rolling high-g turn to the left.

Turn 2
The Imperials won initiative again. The Thunderbolts dropped speed and climbed up to their maximum altitude.

Da Ridgeback and Jawz of Doom uncharacteristically hung back but Flaming Deff flew straight up to take on the lead Thunderbolt at medium range. Despite the hail of bullets no shots hit home.

Turn 3
The Imperials won initiative for the third turn in a row. Both planes stayed high, side slipping and dropping speed. This forced Flaming Deff to overshoot but Da Ridgeback made a rolling high-g turn to get into firing position. Jawz of Doom pulled it's own high-g turn to move closer to the Thunderbolts.

Turn 4
The Orks won initiative in this crucial turn. Flaming Deff continued on a straight course away from the action. Da Ridgeback ended up flashing by the front of Overkill which had pulled a high-g turn. Vladimir unloaded his autocannon at point blank range and damaged Da Ridgeback.

Jawz of Doom pulled a rolling high-g turn to get onto the tail of Noble Victory. At point blank range Skargrod couldn't miss and he duly peppered the Thunderbolt with shots. Miraculously Zaltys managed to keep his stricken bird aloft.


Turn 5
Shakskab had obviously seen enough action for one day so flew the damaged Da Ridgeback straight out of the fight and back towards the big Mek's workshops. Wazgul saw Shakskab disengage and bugged out himself in Flaming Deff.

That left Skargrod all alone against two Thunderbolts. He was obviously distracted because his trailing fire failed to damage Noble Victory.

Overkill made a power dive to escape the Ork fighta while Noble Victory pulled a rolling high-g turn at low speed. That meant the speeding Jawz of Doom pulled alongside Noble Victory.

Zaltys and Skargrod made eye contact for the briefest moment before the planes broke off for their own lines.

Result: Imperial Navy win (24 victory points to 10)

Aftermath
  • The rules for this game are very simple to learn and to put into action. After the second or third turn I had the turn sequence and most of the plane stats memorised. One thing I couldn't see, though, was what happened if a plane exceeded it's maximum altitude. This happened a couple of times with the Orks because I kept the Thunderbolts at level nine knowing the Orks couldn't fly that high.
  • My solo rules allowed me to play through the game but I instantly understood that the real enjoyment of AI comes from trying to outguess your opponent. You obviously can't do that if you're simply rolling dice. The rest of the rules are so basic that the whole of your strategy and tactics come from model placement and manoeuvring. However, if I do play solo again I need to modify how I choose the manoeuvre cards. I got unlucky with Flaming Deff and rolled straight three times in a row meaning he flew right off the table! Maybe roll two dice every turn and pick the most appropriate?

Wednesday, August 26, 2009

CAMPAIGN: Destroy the Gargant aftermath

Lone pilgrim, I have some grave news.

Inquisitor Lord Severus is lost on Celebes. Our mission was to prevent an Ork Warboss, Snitchtongue, from activating a daemonically possessed Banelord Titan. Our Kill-Team took defeat after defeat until we were forced from the planet. Severus refused to leave, instead turning to face the Ork leader in single combat.
There can be little doubt that Severus was overcome, if not by Snitchtongue himself, then by one of his countless Orks.

Warn everyone you can, pilgrim, the Orks are coming and they have a possessed Titan in their warband!


The Campaign
Wow, that turned into an epic campaign. It started off as an excuse to fight a few battles at home and only finished many months later after nine battle reports. This was definitely a learning experience for both of us.

Overall, I think the campaign is quite well structured and it tests each army over a number of very different scenarios. The only criticism I have is that there is little circular section hidden away in there, and we could have ended up going around in circles if the Daemonhunters had won that last game.

The reason that going round in circles would be bad is that you like to feel that your games are going somewhere and contributing to a whole. The loop could have made three or four games meaningless and then forced us to play more games. As it turned out the Daemonhunters lost and that ended the whole campaign.

We ended up playing nine games and I think we both felt that was at least one or two games too many. By the end we were more interested in just getting the games out of the way rather than playing well and coming up with plans and strategies. In a way I was almost relieved that I lost the last game to end the campaign, as if I'd won it could have led to many more games.

This is something to take into account in future campaigns. A long ambitious campaign might sound cool when you are planning it but it can become a slog when you are halfway through and you can't see the end of it. An optimum campaign might consist of between five and seven games in total. Just enough to get your teeth into but not too many to be overwhelmed with.

The Armies
The Orks were a revelation to me as the campaign unfolded. The first thing I was surprised by was just how good they are in the shooting phase. Virtually all of their weapons are Assault, meaning they can keep up a hail of fire even as they close in for close combat. Gary selected the maximum number of big shootas and rokkits in each squad (usually 3) and that meant that at least one was hitting per turn. Even the Ork sluggas are strength 4 so when they do hit, they hit hard. Coupled with the large squad sizes, the Ork shooting was devastating at times. Everything counts in large amounts!

The one standout unit for the Orks in the campaign were the Killer Kanz. They were the Daemonhunters bane in many of the scenarios. This is partly because of the lack of ranged heavy weapons in the Daemonhunter army and partly because of my poor luck in rolling on the damage tables. Even in the scenarios where they started well away from the action they could contribute something with their big shootas. Gary was so impressed with the little walkers he added a Dreadnought in his later games. Nasty.

The Daemonhunters army is not very well suited to fighting Orks. They lack the firepower to challenge the Orks at a distance, don't have the close combat hitting power to tackle them in an assault and are outnumbered in every battle. The Daemonhunters played 9 games in this campaign, losing 6 to the Orks. Even the Daemonhunter wins were very tight and could easily have gone the other way, while the Orks won several games very handily.

The Battle Reports
Writing this campaign for my website has presented a few problems of its own. I started off very blasé and just made things up as I went along. Many of the reports have photographs that don't really match the action and there are several battle reports where I don't have a picture of vital turns or combats. This is down to my bad planning and getting carried away at important points in the game. By the time I was playing the last game I was much more organised and knew what I needed for the battle report while I was playing the game. Although I wasn't really able to take advantage of this during the current campaign I will be much better off for the next one.

This brings me to another factor in the campaign. Because I was concentrating so much on getting photographs and taking notes, I barely had the time to concentrate on the game itself. I'm not just saying this to excuse my poor play (well, not much) but it definitely affected my game. Taking the photos and notes really disrupts the flow of the game and inevitably makes the game longer and slower. If I was to play another campaign I would set more time aside for each game and have much more organised before the game started. Far better to play one game a night well than two games poorly.

The other thing I would try to do is set a deadline for the campaign. This one dragged on for months and months with no date to aim for. It only got completed because I wanted to finish it off for this website. If it was just regular games then I'm sure we would have just abandoned it partway through. Four to six weeks would probably be a good period to complete a campaign.

Tuesday, August 25, 2009

DAEMONHUNTERS versus Orks

Game: Warhammer 40,000 4th edition
Opponent:
Gary
Campaign: Destroy the Gargant campaign game 9
Mission: Breakout
1st turn:
Orks
Points:
1500
Location:
Celebes, Salazar systems, Skolarii Sector
Background:
Reeling from the Ork attacks, the Daemonhunters find their escape route cut off by fast moving Ork forces and the noose closing quickly. The Daemonhunters must smash their way out of the trap or all is lost.

Well, well, well. Two losses on the bounce and suddenly Severus has his back against the wall and MUST win to keep the campaign alive. Since this was potentially the last game of the campaign we decided to up the points value to 1500 points each.

Daemonhunters
  • Inquisitor Lord Severus, Master-Crafted Daemonhammer, Bolt pistol, Holocaust, Icon of the Just, Consecrated Scrolls, 2xAcolytes, Power Armour, Bolt Pistols and Close Combat Weapons, Acolyte with Laspistol and close combat weapon
  • 2 Daemonhosts
  • Inquisitor Kurven, Psycannon, Power armour, Emperor's Tarot, Hammerhand, Gun-servitor with plasma cannon, 2 veterans with plasma guns, 2 sages, Mystic
  • Squad Matoso, 8 Inquisitorial Stormtroopers, Veteran, Bolt Pistol, Power Weapon, 2x Flamers, Rhino with extra armour, hunter-killer missile, smoke
  • Squad Vargas, 5 Stormtroopers, 2x Plasma Guns
  • Armoured Fist Squad (inducted Imperial Guard) Sergeant, Close Combat Weapon, Laspistol, Flamer, Chimera, Multilaser, Heavy Bolter, Smoke Launchers, hunter killer missile, heavy stubber, Searchlight
  • Infantry Platoon (inducted Imperial Guard) Command squad, junior officer with power sword and plasma pistol, medic, vox caster, 2 plasma guns, Infantry squad missile launcher, grenade launcher, vox caster, Infantry squad missile launcher, grenade launcher, vox caster
  • 3 Sentinels, 2 Multilasers, 1 Autocannon with extra armour and improved comms

Orks
  • Brazhak Snitchtongue, Warboss, Mega Armour, MegaBooster, CyborkBody, 5 Brazhak Bully Boys, Nobs, Sluggers, Choppas, 'eavy Armour, 1 wartrukk, big shooter
  • 16 Greengobs Slugga Boyz, 3 Rokkits, Nob, Iron Gob
  • 10Tusk Sharpeye Shooter Boyz, 2 big shootas
  • 5 Bang Boyz Tank Busterz, 3 rokkits
  • 10 Grots, Slaver with grabber stick
  • 11 Shoota boyz, 3 big shootas, Nob
  • 5 Warbikes
  • 3 Killer Kanz, Big shootas
  • Dreadnought, 2 Rokkit Launchas

Terrain and deployment
This mission places the Daemonhunters in the centre of the board and the Orks in two distinct groups on either side of them. My plan was for the static elements of the Daemonhunters army, mainly the Imperial Guard, to hold the hill in the middle of the table and hold up one group of Orks while the rest of the Daemonhunters army made a break for it in the opposite direction.

This is a view from one Ork group. The Daemonhunters vehicles were all set up facing in different directions to keep the Orks guessing about which area they would try to break through.

Gary put all of his Heavy Support, in the form of the Killer Kanz and the Dreadnought, on one side of the board. The Ork Warboss' Truk can just be seen on the right of the picture. Unsurprisingly, I took my Daemonhunters in the opposite direction!

I was very confident at this early stage in the game because there were a lot of fast elements in the Daemonhunters army and I was aiming to completely overwhelm the weaker Ork flank. The Sentinels can just be seen on the left of the picture. They were to duel at range with the Killer Kanz and Dreadnought throughout the game.

The main thing I wanted to do with the Guardsmen in the centre was to shoot out the Ork Truk and leave the Warboss miles from the real action. The missile launchers missed but a grenade launcher came up trumps. This left an angry Ork in Mega-armour right in front of the units who had destroyed his ride. Gulp.

Warboss Snitchtongue got stuck into the Guardsmen with gusto but their morale held and the combat would continue, thus ensuring the Ork would be a spectator for the rest of the game. The Warbikes rounded the hill and bore down on the rhinos. In a hail of gunfire a glancing hit blew up Severus' ride and killed several of his retinue.

In the assault phase the Warbikes joined in the fight against another unit of Guardsmen, hoping to reduce the Daemonhunters fire power.

Although the bikes killed their opponents and swept out after Severus, Snitchtongue failed to break the handful of brave Guardsmen on the hill and was still stuck in combat.

All of the transports disgorged their occupants as the Daemonhunters made a now desperate dash for the board edge. The Sentinel Squadron has been reduced to a single vehicle as the Orks' own walkers have taken their toll. If the Daemonhunters can just withstand another round of shooting they might just scrape a win.

Alas, it was not to be as the Warbikes took out the second Rhino with another glancing hit and a shoota boy squad blew up the Chimera as it glanced the side armour.

With Severus' retinue being wiped out by more shoota boyz fire and the Sentinel being taken out by the Ork Dreadnought, the Daemonhunters couldn't possibly win the game. Severus did the only respectable thing and turned to face the Ork Warboss in single combat.

Severus charged in and rolled terribly for combat (three ones and two twos - maybe he tripped on his robes as he ran in) but Snitchtongue rolled just as poorly and the combat continued.

The holocaust power knocked out many of the Ork retinue and at the end of the game the Inquisitor and Warboss were still knocking lumps out of each other.

Result: Loss

Aftermath
That's it, after nine games and almost as many months - the end of the campaign! The Orks win and Gary has bragging rights until we fight another campaign.

As far as this game goes, I was robbed! We had already fought this game before earlier in the campaign and it was one of the few as Daemonhunters that I won. Their speed combined with the Orks relative lack of speed gives the Daemonhunters an advantage. That was blown away in this game when I lost two vehicles to glancing hits on the same turn. That cost me the game as not only did I lose their mobility on the tabletop, but I also lost units that could have exited the board.

It was all down to that surprisingly effective Ork shooting. The Killer Kanz and Ork Dreadnought did for the Sentinels as one after another went down to long range sniping. I just couldn't get the good rolls on the damage tables against the Kanz as once more they survived the game.

So what started off as a relatively comfortable battle for me soon descended into a desperate scramble and then a sound defeat.

Sunday, August 23, 2009

DAEMONHUNTERS versus Orks

Game: Warhammer 40,000 4th edition
Opponent:
Gary
Campaign: Destroy the Gargant campaign game 8
Mission: Relief Force
1st turn:
Orks
Points:
1000
Location:
Celebes, Salazar systems, Skolarii Sector
Background:
Driven away from the Gargant by its guards, the Daemonhunters take refuge in the sprawling Ork encampment and vox for reinforcements from their reserves. Help is on its way, but the Daemonhunters must hold out until they can arrive.

So I failed at my previous attempt to trigger the Terminate the Daemonhost scenario and this relief force mission would be my second chance. If the Daemonhunters won, they could go on to try and end the campaign with a positive result. If they lost the Daemonhunters would be in serious danger of losing the whole campaign.

Daemonhunters
  • Inquisitor Lord Severus, Master-Crafted Daemonhammer, Bolt pistol, Holocaust, Icon of the Just, Consecrated Scrolls, 2xAcolytes, Power Armour, Bolt Pistols and Close Combat Weapons, Acolyte with Laspistol and close combat weapon
  • Death cult assassin
  • 2 Daemonhosts
  • Inquisitor Kurven, Psycannon, Power armour, Emperor's Tarot, Hammerhand, Gun-servitor with plasma cannon, 2 veterans with plasma guns, 2 sages, Mystic
  • Squad Matoso, 5 Inquisitorial Stormtroopers, Veteran, Bolt Pistol, Power Weapon, 2x Flamer
  • Squad Seralvo, 5 Storm troopers, 2x grenade launchers
  • Squad Godirtho, 5 Storm troopers, 2x melta guns
  • Squad Vargas, 5 Stormtroopers, 2x Plasma Guns, Veteran Sergeant with Plasma pistol, Auspex
  • Orbital barrage, Barrage Bomb

Orks

  • Brazhak Snitchtongue Warboss, Mega Armour, MegaBooster, CyborkBody, 5 Brazhak Bully Boys, Nobs, Sluggas, Choppas, Wartrukk, big shoota
  • 16 Greengobs Slugga Boyz, 3 Rokkits, Nob, Iron Gob
  • 10Tusk Sharpeye Shooter Boyz, 2 big shootas
  • 5 Bang Boyz Tank Busterz, 3 rokkits
  • 10 Grots, Slaver with grabber stick
  • 11 Shoota boyz, 3 big shootas, Nob
  • 3 Killer Kanz, Big shootas
  • Dreadnought, 2 Rokkit Launchas

Terrain and deployment
The Relief force mission called for the Daemonhunters to start the game with their HQ, Troop and Heavy Support options in the objective building, with the rest of their army in reserve. The Orks could then set up their entire army anywhere on the board more than 18" away from the objective. The attacking Orks would capture the building if they had models inside and there were no defending models left in the building. The game was to last a variable number of turns.


As you can see, all of the Stormtrooper squads began in the building. Inquisitor lord Severus also started off in there, on the ground floor. The Orks can be seen at the top of the picture, already worryingly close and the game has even begun yet! In particular, the Killer Kanz and Dreadnought are making a bee-line for the building.

The view from the top of the hill. Two units of Shoota Boyz are ready to unleash a hail of fire into the defenders.

The game

The Orks take the first turn and move in on the beleaguered defenders. Many of the Stormtroopers will be shot down by Big Shootas. Squad Vargas is reduced to just two models.

The thinned down Daemonhunters strike back with a meltagun shot from Squad Godirtho taking down the Dreadnought. The Ork Bang Boyz can be seen on the left with 3 Rokkits while on the right the Greengob Slugga Boyz advance behind a Grot screen.

Turn two begins with another bold move from Warboss Snitchtongue as he barrels forward in his Trukk and disembarks right in front of the building. The rest of the Orks manoeuvre for position and riddle the defenders with fire. Squad Vargas is wiped out and Squad Seralvo now have just two survivors.
The turn goes from bad to worse for the Stormtroopers as Squad Godirtho is charged by the Ork Warboss and wiped out.

The Orks consolidate into Severus' squad to continue the carnage, but in the next assault phase the Orks go from this...

...to this. Stormtrooper Squad Matoso assaulted in (with their veteran sergeant with a power weapon) to help out Severus. Most of Severus' retinue is killed and all but one of the Nobz accompanying Snitchtongue go down too.

Elsewhere on the battlefield the Daemonhunter reserves begin arriving. On the left here, Kurven has arrived to give some covering fire but he is quickly swamped by Greenskins as the Trukk and Killer Kanz are diverted to deal with him. That could be messy. On the right the two Daemonhosts have emerged from the Warp and are facing off against the Slugga Boyz and Grots.

The Greengob Slugga Boyz abandon their Grot screen and get stuck in to the Daemonhosts. Although the Greenskins are winning the battle easily on victory points, are their units being too easily distracted from the objective?
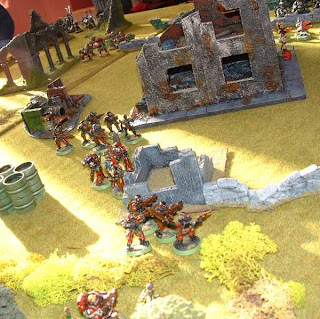
Warboss Snitchtongue is taken out by Severus! The last Nob goes down soon after and that leaves the objective building in Daemonhunter hands. The Orks need to redeploy quickly as just one surviving Daemonhunter model in the building at the end of the game would win them the game.

The Killer Kanz move in on the building having dealt with Inquisitor Kurven. They are assaulted by the assassin emerging from reserve who desperately tries to slow them down but he is quickly snipped in two.

Severus and the survivors from Squad Matoso draw up onto the upper floors to keep away from the advancing Killer Kanz.

The Greengob Slugga Boyz are still trapped in a stalemate with the Daemonhosts. It is unlikely now that either unit will play any further part in the game.

The Killer Kanz make it into the building and launch an assault upon Severus and the Stormtroopers. The game will be decided in this one combat.

Unsurprisingly, the Killer Kanz prove to be the bane of Severus and his Daemonhunters as they clear the objective building and win the game for the Orks.

Result: Loss

Aftermath
This was a tight game, only being decided in the last close combat phase. Predictably it was the Killer Kanz who were the game winners yet again. They soaked up a lot of Daemonhunter shooting (for one immobilised result), killed Inquisitor Kurven and his retinue, a death cult assassin and then Inquisitor Lord Severus himself. They are especially deadly in these Cityfight missions when they can deploy 18" away from the enemy. That makes them an immediate threat and the Daemonhunters simply don't have the shooting or assault elements to deal with them effectively.

The Orks almost had the game in the bag on turn two when they had a good round of shooting followed by Snitchtongue's assault on the building. If the Orks had taken down Severus (and they maybe should have) the Daemonhunters would have been in all sorts of trouble. Fortunately the Inquisitor survived and he instigated a sterling fightback.

The Daemonhunter reserve elements arrived and tied up several Ork units, pulling them away from their real objective, the central building. With Severus, a formidable opponent actually on the objective, the balance had swung back in the Daemonhunters favour.

Now the Orks had to scramble to kick him out of the building and only some good difficult terrain rolls and that final, all important, round of close combat decided the game.

So, another loss for the Daemonhunters and that is very bad news. The campaign loops back around to a desperate breakout attempt by the Daemonhunters, and if they lose once more the entire campaign will be over.

Saturday, August 22, 2009

DAEMONHUNTERS versus Orks

Game: Warhammer 40,000 4th edition
Opponent:
Gary
Campaign: Destroy the Gargant campaign game 7
Mission: High Ground
1st turn:
Daemonhunters
Points:
1000
Location:
Celebes, Salazar systems, Skolarii Sector
Background:
At last, the Daemonhunters are in sight of their objective, towering above them in the centre of the construction fields. Driving hard for the Gargant, they are discovered by a roving Ork patrol and make a break for their target before being intercepted by its guards.

This is an important game in the campaign because if the Daemonhunters win it triggers the Terminate the Daemonvessel scenario and that brings the campaign to a close. If the Daemonhunters fail this mission they have only one more chance to make it to the Gargant otherwise the campaign loops back around to the breakout mission and the possibility of the Daemonhunters completely flunking their mission.

Daemonhunters
  • Inquisitor Lord Severus, Master-Crafted Daemonhammer, Bolt pistol, Holocaust, Icon of the Just, Consecrated Scrolls, 2xAcolytes, Power Armour, Bolt Pistols and Close Combat Weapons, Acolyte with Laspistol and close combat weapon
  • Death cult assassin
  • 2 Daemonhosts
  • Inquisitor Kurven, Psycannon, Power armour, Emperor's Tarot, Hammerhand, Gun-servitor with plasma cannon, 2 veterans with plasma guns, 2 sages, Mystic
  • Squad Matoso, 5 Inquisitorial Stormtroopers, Veteran, Bolt Pistol, Power Weapon, 2x Flamer
  • Squad Seralvo, 5 Storm troopers, 2x grenade launchers
  • Squad Godirtho, 5 Storm troopers, 2x melta guns
  • Squad Vargas, 5 Stormtroopers, 2x Plasma Guns, Veteran Sergeant with Plasma pistol, Auspex
  • Orbital barrage, Barrage Bomb

Orks

  • Brazhak Snitchtongue Warboss, Mega Armour, MegaBooster, CyborkBody, 5 Brazhak Bully Boys, Nobs, Sluggas, Choppas, Wartrukk, big shoota
  • 16 Greengobs Slugga Boyz, 3 Rokkits, Nob, Iron Gob
  • 10Tusk Sharpeye Shooter Boyz, 2 big shootas
  • 5 Bang Boyz Tank Busterz, 3 rokkits
  • 10 Grots, Slaver with grabber stick
  • 11 Shoota boyz, 3 big shootas, Nob
  • 3 Killer Kanz, Big shootas
  • Dreadnought, 2 Rokkit Launchas

Terrain and deployment

The mission was High ground (from the Cityfight Codex) and both armies were trying to capture the 3 storey building we placed near the centre of the board. The mission allows for units to set up 12" from enemy squads so we both knew the game would be brutal. Due to the deployment rules both armies left virtually all of their transport vehicles back at base camp.

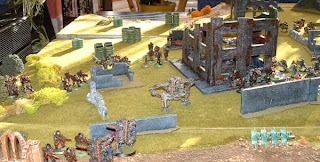
The Orks deployed in a concave fashion, ringing the objective building. The relatively open Ork right flank was covered by their Shoota Boyz while the Ork left contained most of their hard hitting elements. The Warboss' Trukk can just be made out behind the Killer Kanz.

The Daemonhunters opposed the Ork heavy support with Squad Vargas (plasma guns) in the ruins near the front of the picture, Squad Godirtho (melta guns) in the edge of the woods on the left of the photo, and Inquisitor Kurven's squad deeper in the wood. At the top of the picture you might just be able to make out Squad Seralvo taking cover behind some barrels.

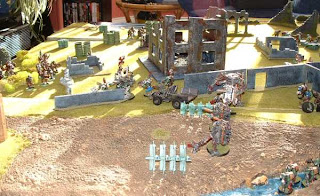
The view of the Ork lines from the Daemonhunters board edge. The Death Cult Assassin is ready to run forward into the objective building. I set the Daemonhunters up pretty close to the Orks on this side, hoping to get first turn and take some of the Killer Kanz down immediately. Of course if I lost first turn I would be in a spot of bother.

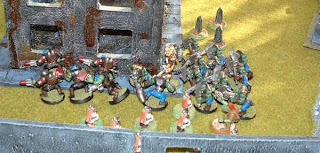
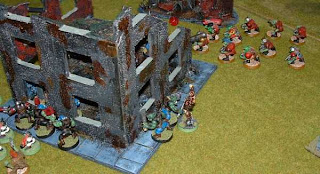
The refused Ork right flank covered by Tusk Sharpeye and his Shoota Boyz. You can also see directly into the objective building. If models from both sides are in the building when the game ends you fight further rounds of close combat until one or other side is destroyed. With such a large objective building (almost 12" square and 3 storeys high) it was likely a scrap would take place to decide the winner.

Turn 1

Fortunately for me and the Daemonhunters I won the dice off for the first turn (with the help of the Emperor's Tarot). Unfortunately my shooting phase was poor and I only managed to destroy one big shoota and stun one of the Killer Kanz despite 4 plasma gun shots, 2 meltagun shots, a plasma cannon shot and three psycannon shots.

Warboss Snitchtongue raced forward and dismounted from his Trukk to make the Stormtroopers pay for their failed gamble.

A view from the Ork lines as the Warboss is about to charge into Squad Godirtho.

In an appalling round of combat the Warboss and his retinue only killed one member of Squad Godirtho. To make matters worse, the 3 survivors routed, leaving the Warboss standing within rapid fire range of virtually every gun in the Daemonhunters army.

Turn 2
Squad Matoso moved up and flamed Snitchtongue and his Nobz with their two flamers. Making up for the last turn of pathetic shooting by the Daemonhunters they killed four of the Nobz and even wounded the Warboss twice (double 1 on a 2+ save!). Squad Seralvo weighed in and killed another Nob with their Grenade Launchers, leaving Snitchtongue all on his own. And then the newly rallied Squad Godirtho instantly killed the Warboss with their Meltaguns!

The Warboss' trukk was taken out by Squad Kurven but the Plasma Cannon Servitor died in a overheat (despite the re-roll for the Sages and a 4+ armour save). The Barrage Bomb arrived this turn and I had targeted the small building in the centre of the Ork lines (top right, near the red and white Grotz). I chose this location thinking most of the Orks would have to pass by it to get to the objective. Unfortunately it missed every Ork but at least it would keep coming on until the game ended.

The Daemonhunters survey the devastation they have caused. A wall of walking metal in the form of Killer Kanz and the Ork Dreadnought still awaits them.

Turn 3

The rest of the Ork army moves toward the objective. The Tankbustas are moving through the doorway and the Slugga Boyz push on, screened by the Grotz. They are all stunned when a Daemonhost appears out of thin air, right on the objective. The second Daemonhost is inside the building.

All of the Daemonhunters, bar Inquisitor Kurven, make a break for the objective building. They are all pulling away in one direction because...

...a bloody great Dreadnought is striding toward them! Meanwhile, the Killer Kanz avenge their fallen Warboss by assaulting Squad Godirtho. This time the Stormtroopers aren't so lucky and they are all killed.

The Orks are almost on top of the objective now. Their left flank attack is about to punch through the Daemonhunters forces and is threaten Inquisitor Kurven in the woods.

The Orks take on the Daemonhosts. The Orks lose 4 Slugga Boyz and cause no damage to the Daemonhost, but the fight continues.

The Killer Kanz have swept right up to the Daemonhunter board edge and have Inquisitor Kurven in their sights. Over the following turn they assault the Inquisitor and rout him off the board.

Turn 4
The Daemonhost takes out another 3 Slugga Boyz but this time takes 3 wounds in return.

The Daemonhunters have no choice but to try and take out the Dreadnought.

Squad Seralvo have made it onto the objective building as Severus and the other Daemonhost engage the Dreadnought. One Acolyte is killed and the metal behemoth is unscathed.

Spot the Death Cult Assassin! He picks his way through the building to assault the Ork Tankbustas. He must have tripped over some rubble though as he is killed by the Orks. The Daemonhost finally goes down under the green wave of Orks who now consolidate into the building.

With Severus pinned in combat with the Dreadnought he is unable to prevent the Killer Kanz from joining in. Another Acolyte falls. The second Shoota Boyz squad now put in an appearance as the game seems to be slipping away from the Daemonhunters.

Turn 5

The remaining Daemonhost teleports out of combat to try and contest the objective. He assaults the Slugga Boyz who must be thoroughly sick of Daemonhosts by now. Sharpeye pushes his Boyz forward to pile onto the objective in the closing moments.

The Tankbusta Boyz take on the Stormtroopers in a close range firefight. The final Acolyte is snipped in two by the Dreadnought, leaving Severus all on his own against the three vehicles.

Squad Seralvo are wiped out by the Orks on the objective and the Slugga Boyz kill their second Daemonhost opponent of the game. The last man on the board for the Daemonhunters is Severus who goes down under the attacks of the Killer Kanz and Dreadnought.
The Orks have won the game.

Result: Loss

Aftermath

A comprehensive win for the Orks.

I knew the Daemonhunters would struggle in this scenario so I gambled everything on winning the first turn and doing some damage to the Orks before they could strike back. In particular, the Killer Kanz have plagued me throughout this campaign and I wanted to take them down early. Plus Gary had added a Dreadnought too. If I let them get onto the objective I could kiss the game goodbye!

Part one of my plan worked as I won first turn but it was downhill all the way from there. None of the Killer Kanz went down despite my concentrated fire and I knew I was doomed. Things looked up briefly when I took out the Warboss for no real losses but my failure to dent the klanking metal walkers cost me the game. It meant I had to use Severus and a Daemonhost on them when they would have been far better off on the objective, and even then the Dread and Kanz won the combat.

Elsewhere, my Barrage bomb was useless as it never hit a thing in the entire game. This was despite a lot of potential targets from turn 2 onwards as it came down in the Ork lines. When will I get a decent scatter for this thing?
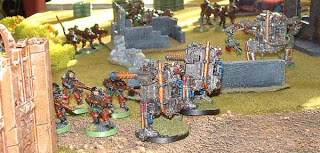
Squad Seralvo, one Daemonhost and the Assassin were far too lightweight to contest the objective and were kicked off it in a couple of turns by the Greenskins.

So the Daemonhunters have one more chance to force the key scenario, this time fighting the Relief Force mission, again from the Cityfight codex.